Fight daily with the little memory of your smartphone and have you realized that occupy most of the space are the photos? I realize that having your taps always tap is very convenient, but it’s not as enjoyable as to sling space here and there to not touch them. No, quiet, I’m not suggesting you erase your precious photos: what you should do is transfer the photos, maybe on your computer, so you still have them available but free up a lot of space on your phone, apps, and games of interest to you.
You were thinking of such a solution as well, but being not a great tech expert, do not you know how to download photos from your phone to your PC? No problem, you’ve come to the right place at the right time: in the lines below, in fact, I’ll explain how to switch your photos from your smartphone to your computer using the most popular devices and operating systems: Android, iOS, Windows and MacOS.
I assure you that this is really a joke, then there are several ways to do so: you can connect the phone to your PC via USB cable, or if you prefer, you can use cloud services to download and sync your photos over the Internet. Do not worry, you do not need to be a technology genius to transfer pictures: take a few minutes, read more about what I’m doing and you’ll see that downloading photos from your smartphone will be easy!
Android
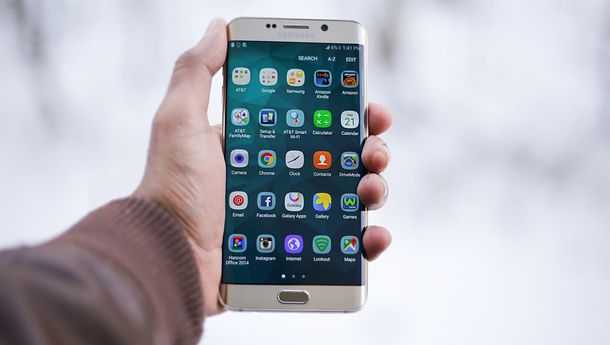 Do you own an Android phone? This is the guide that is for you: below I’ll explain how to download photos to your computer both with Windows and MacOS using the supplied cable; do not you have one available? Do not worry: you will also learn how to use the cloud (and then the Internet) to transfer images without physically connecting the two devices.
Windows
The easiest way to download photos from Android to Windows is to use File Explorer, that is, the file management program already included in your computer’s operating system. Fortunately, the latest Windows versions already have the drivers needed to properly recognize the smartphone, so you do not have to bother to download strange files to install with such patients.
Get the USB cable of your smartphone, with it connecting your smartphone to your computer; open the File Explorer (the yellow folder icon in the bottom bar) and choose how to proceed: you can directly access your device’s memory and download the photos manually with the classic copy and paste, or use a wizard for capturing images.
To download photos “by hand,” sign in to the Android notification area – scrolling your finger from the top of the screen -, a note about the USB optionsnotification, and then put the checkbox in the File transfers box . Verify that the Debug USB item is not selected in Settings> Developer Options, otherwise uncheck (usually the Developer Options menu is not by default, so if you do not see it, do not worry: it is unlikely that the Debug USB item is unavailable ).
Then move to your PC and, in the File Explorer window, click on the icon of your smartphone in the left bar. Double-click the Internal Memory icon if your photos are in the phone’s internal memory or on External Memory if they are in the memory card and double-click the DCIM folder: there are all the photos taken by your smartphone and you can download them on your PC with a copy and paste.
If you want to use the Image Acquisition wizard, from File Explorer, you need to make your phone “recognized” as a camera. Then open the Android notification area, tap the USB options entry, and then tap the Photo Transfer (PTP) checkbo. Now right-click on the smartphone icon on the left of File Explorer, then click Import Images and Videos.
Please wait for the image and video search to complete (it may take a few minutes), tick the Import all new items box now , from a name to your collection by typing it in the text box and clicking the Import button. Once you have completed the procedure, you will find the photos in the Windows Pictures folder, in a subdirectory that contains the date and name you previously assigned.
Do you have Windows 10 available? Know that there is an even faster way to download photos from your phone to your PC: I’m talking about the photo app already installed in the operating system! To download photos via the app, set your smartphone mode Transferring pictures as I explained to you earlier, open the Start menu by clicking on the flag at the bottom left of the screen, scroll down until you find the icon Photo and click on it. Now click on the Import button (the rectangular one with a down arrow, then select the entry From a USB device.
Wait for the phone’s memory to be completed, click the blue button Continue , click the Edit Import location link to choose the folder where you want to save the images, and then click on the blue button Import : Once the process is complete, you will find the photos in the folder you chose, divided into so many sub-folders as many months as you took the photos.
MacOS
To download photos from your Android phone to your Mac, you can rely on two different solutions: you can use the Image Acquisition already on your operating system, or rely on the Android File Transfer application ; Both solutions are equally efficient: it is up to you to choose the one that you find most comfortable!
For the first solution, connect the smartphone to the Mac with the supplied USB cable, call up the Android notification area, tap the USB options entry and check the Photo Transfer (PTP) checkbox. move on the Mac, open LaunchPad, click on the Other folder, and then click on the Image Acquisition icon.
Wait a few moments, click on the photo you want to download (you can select more than one by holding down the cmd key and clicking on the photos or selecting them all using cmd + a ) and choose the folder where you can download it from the Import In drop-down menu. Then click the Import button to download the selected photo or photos, or click the Import All button to download all the photos on the device. You can also download photos by dragging them directly from the Image Acquisition window to the folder where you want to download them.
If the Image Acquisition procedure does not satisfy you or want something more detailed, you can take advantage of the MacOS-specific Android File Transferprogram , which allows you to directly access the memory of Android devices. Before downloading the app, remember to set your phone to file transfer mode: connect your phone to the Mac, call up the Android notification area, hit the banner Touch to see more USB options, and select the File Transfer box.
To download Android File Transfer linked to the program’s website , click the Download Now button and, once the download is complete, click the downloaded file and drag the Android File Transfer icon to the MacOS Applications folder. Double-click the Applications folder, right-click the Android File Transfer icon and then click the Open button (you will only need to do it at first, then you can start the program normally). Now click on the Start button, wait a few moments and you will see the entire contents of your smartphone’s memory.
At this point, double-click the DCIM folder of your smartphone if your photos are saved on the internal memory of the device, or on the Storage, sdcard0 (or internalSD ) folders, and then DCIM if your photos are saved on the memory card. All you have to do now is to select the photos and drag them to the folder you want.
Did not you get the result you hoped for or did the two methods I explained to you did not fully convince you? I also urge you to consult my tutorial on how to transfer files from Android to PC, where I’ve covered the topic in more detail.
Cloud Services
Another very efficient way to download photos from your phone to your PC when talking about Android is to take advantage of the cloud space offered by Google Photos : downloading this app not only lets you send photos to the Cloud and get free space , but you can easily access photos from both your PC browser and Google Drive apps, and download them from there. If you have not downloaded and configured the Google Photos app on Android yet, I recommend that you do so as soon as I follow my tutorial .
The fastest way to access your photos is to use your browser: Link to the Google Photos website , enter your credentials and click the Sign In button ; click on a photo to start the selection mode, click on all the photos you want to download, then press the Menu button ⋮ located at the top right and select the Downloaditem (alternatively, press the Shift + D keys simultaneously ); you just have to choose the folder where you download the photos and click the Save button : the images will be enclosed in a .zip archive, which you can open with the most appropriate program .
Another way to download photos through Google Photos is to take advantage of the Google Backup & Sync program available for Windows and MacOS: download it from its official Internet page by clicking the blue Download button , then clicking the Accept and download button . Once the download is complete, open the downloaded file and wait for the program to be installed on your computer. Then open the Google Backup and Sync application from the Start menu (the flagged icon at the bottom left) if you’re on Windows, or from the Applications folder if you’re on macOS and click the blue Start button .
At this point, enter your Gmail address in the appropriate box, press the blue button Next , enter your account password, and then click the blue Sign Inbutton . Wait a few moments to synchronize the files, then click the blue OKbutton . When you sign in, choose the folders you want to sync with Google Drive, place the check box on the High Quality box (so you’ll have free space to store your images) and, if you like, select Upload photos and videos in Google Photos to automatically upload photos taken from your computer to the cloud.
Finally, presses the buttons Next , OK and Start : after a few minutes, you can access your photos and all files stored on Google Drive by clicking on the Google Drive in the sidebar File Explorer (Windows) or Finder (on MacOS).
iPhone
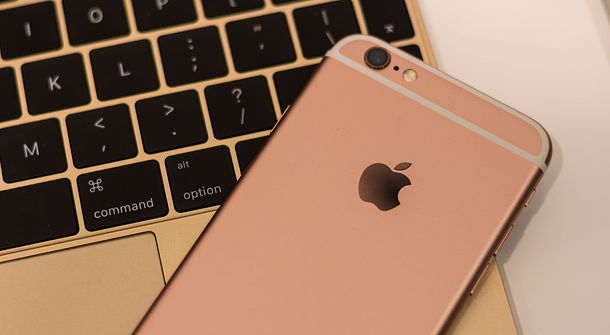 If your mobile phone is an iPhone , you can refer to this part of my guide: The following will illustrate the methods to download photos from your iPhone by the computer, and Windows to Mac , using the supplied cable. If you do not have one at your fingertips, you can still be happy: I’ll explain how to use iCloud to download photos to your computer.
Windows
It may sound strange, but even though the iPhone is produced by Apple and Windows is produced by Microsoft, there is no problem downloading the pictures from the mobile phone to the computer: the USB / Lightning cable provided, a few minutes of free time and game is done! The basic thing to do is install iTunes: Apple’s home multimedia software, including Windows, also includes the drivers needed to recognize the iPhone (and iPad) from the PC.
If you have not already downloaded iTunes on your computer, then link to this Web page and press the blue Download button . When the download is complete, open the iTunes installation package (eg iTunes6464setup.exe ) and, in the window that opens, click the Next button . Remove therefore the check mark from the box Use iTunes as the default player for audio files (if you prefer to continue to open music files with the program that you normally use) and click on the button Install , Yes (twice in succession) and End to end the setup. Choose whether to share your library data with Apple by pressing and holding I agree or not, thank you .
After installation is complete, connect the iPhone to the PC via the supplied USB / Lightning cable, unlock the phone screen and click on the Authorize button , enter your iPhone security code and wait a few seconds for Windows to configure your phone. If you are not interested in syncing with iTunes, you can also close the program, otherwise follow the on-screen instructions to turn it on.
Open now a window of Explore File , clicking on the icon in the shape of yellow folder you find in the bar at the bottom left of your PC ,: in the left bar you’ll find on the iPhone icon. Now you can access the mobile phone’s memory simply by clicking on its icon: Double-click the Internal Storage , DCIM and then 100Apple folders and, with the classic copy-paste , copy the photos you want to download.
Alternatively, you can use the Image Acquisition Wizard: In File Explorer , right-click the icon on your iPhone, click Import Imagery and Video , wait for the search to complete, then tap the check box Import all new items now .
Now give a name to the collection, typing it in the appropriate box, and clicking the Import button : the downloaded photos will be copied to the Windows image folder in a subdirectory containing the capture date and the name you are assigned to.
If you have Windows 10 , you can also use the Import Wizard with the built-in Photo App : Install iTunes and configure your iPhone as I explained earlier, then click on the Start menu (the flag icon, in the lower left corner of the screen) and then on the Photo item .
Then click the Import button (a rectangle with an arrow in the inside), then click on a USB device ; click the blue Continue button and, if you want to choose a custom folder to save your photos, click Edit Import Location and choose a new folder. Finally, click on the blue Import button and wait a few seconds: you’ll find the photos, subdivided into so many sub-folders, how many months have they been taken, in the folder you chose.
Do you need more information or look for alternative methods to transfer photos from iPhone to Windows? You can see my guide on how to transfer photos from iPhone to PC for further explanations and alternative methods.
MacOS
Want to download your photos from the iPhone to your Mac? Nothing simpler! Being two Apple devices, you can go ahead with what you already have installed: I’m talking about Photo and Image Acquisition applications already on your Mac, just waiting to be used! It is up to you to choose the one that is most congenial to you.
To download photos from iPhone to Mac with Photos, connect the iPhone with the supplied cable and click on the Import All New Items button at the top right. After completing the procedure, you can find all the photos and videos in the Photos app, which saves everything within its library (a single file where all photos and videos in the application are stored). To export photos from the Photos app, drag their thumbnails to a folder of your choice.
To use, instead, Image Acquisition , click on the LaunchPad icon, then on the Other folder and click the Acquire Image icon . To start a program, select your iPhone name from the left sidebar, click on the photos to download, by using the cmd button (to select multiple items at once), and choose the folder where you want to save the photos from the drop-down menu Import In ; Finally, click Import to download selected photos, or Import All to download the entire iPhone gallery.
If you want, know that you can download photos from Image Acquisition to your computer by also selecting them with your mouse and dragging it to a folder of your choice.
Cloud Services
Do you know that thanks to the Apple ID that you have configured on the iPhone, do you have the ability to download your photos from the iPhone to your PC even by using the iCloud service ? As a cloud storage service, iCloud allows access to files that it manages from both Windows and MacOS, using a dedicated browser or client (which is already installed in the Mac).
The important thing is to enable the iCloud Photo Library service , which allows you to permanently save iCloud photos and videos by erasing storage space on iCloud Drive (therefore requiring an iCloud payment plan). Alternatively, you can use the Streaming Photo service , which only stores photos, albeit temporarily, and does not allow access to these from the browser. To learn more, read my tutorials on how to store photos on iCloud .
If you’ve enabled the iCloud Photo Library (from the Settings menu > [Your Name]> iCloud> iPhone Pictures ), you can download the photos from browsers by connecting to the iCloud website by entering your credentials and clicking the Sign In button to access the your account. Once you have accessed, click on the entry Start using iCloud , then click the Photos icon , wait for your photo library to load (if it is the first time you use the service, it may take a few minutes), click photos you want to download (you can select more than one by pressing and holding the cmd key or the Shift key, depending on whether you are using macOS or Windows) and press the Download button at the top (the one with the arrow pointing down).
If you have a Windows PC , you can use the official iCloud client and get an automatic iCloud Photo Streaming or Photo Streaming sync with your computer. To download the iCloud client on your PC, linked to the Apple site and click on the Download button . When download is complete, open the icloudsetup.exe file , place the check box on the I accept the terms of the license agreement box, click on the Install , Yes, and Finish buttons and wait for iCloud to open automatically. If the program does not start but you are prompted to restart the PC, you agree.
When the iCloud client starts up, log in by entering the credentials of your Apple ID and clicking on the Options button next to Photo . Then choose whether to enable synchronization of the iCloud Photo Gallery and / or Photo Streaming , by typing the checkbox beside the appropriate entries, and clicking the OK button . Now wait a few seconds for photos to be downloaded to your computer, open the Pictures folder of your computer, then the iCloud Photos folder and you will find the photos of your iPhone there.
If you have a Mac , using iCloud is even simpler: you do not have to install anything because, as I said, the application is already included in the operating system; if you have not yet configured an Apple ID, click the System Preferencesicon on the Dock bar and select the iCloud icon ; enter the username and password of your iCloud account in the appropriate boxes and click the blue Sign In button .
Once you’ve reached this point, simply open the Photos app from the Applications folder on your Mac: the pictures taken on your iPhone are there to wait for you. If the Photos app does not display iCloud photos, go to the Photos> Preferences (top left) menu , select the iCloud tab and choose whether to enable the iCloud Photo Library and / or the Photo Streaming by marking the check next to the appropriate options.
If some passage is not clear and / or you want more detailed instructions on how to switch photos from iPhone to Mac , take a look at the tutorial I wrote on the subject.
Another guide you might want to use is how to see the photos on iCloud : read it and find out all the solutions to access the photos you’ve stored on your iCloud account from iPhone, iPad, Windows PC and Mac.